Home » 2023
Yearly Archives: 2023
Modern Millionaires Review
Modern Millionaires Review teaches students how to build their digital marketing agency. The business model is based on running paid ads for local businesses.
It also includes training on how to sell to businesses and cold emailing. This is a valuable skill that many other courses skip over.

If you’ve been looking around IBuyIReview for online programs that teach people how to work from home and make a full-time income, then you have probably come across some advertisements for Modern Millionaires. Created by entrepreneurs Abdul Samad and Chance Welton, this program claims to provide a step-by-step framework for building a successful online business that generates a consistent and scalable income. But is it really what it claims to be? Let’s take a closer look at the program to find out.
The first module of the course covers the foundation of lead generation and prospecting. It then moves on to ad campaigns and how to drive traffic to your website using Google and Facebook ads. After that, you’ll learn how to nurture your leads and close sales. The course also includes a bonus section on how to set up and use a CRM system like Leadific, which will help you automate your lead generation and sales processes.
It’s worth noting that the MM program is fairly expensive, with prices ranging from $5000 to $15,000 (DIY or DWY). This may be off-putting for many people who are hoping to earn a full-time income from their new business. However, it’s important to remember that this business model is not a scam and can be a very lucrative opportunity for those who are willing to put in the work.
Once you’ve signed up for the DM program, you’ll be given three different packages to choose from. The first is called the DIY package, which includes everything you need to start your own marketing agency from scratch. This package costs $7,995.
The second option is the DWY package, which includes the same training as the DIY package but also includes a team of experts who will help you grow your business. This package costs $15,000 and is designed for individuals who are looking for a more hands-off approach to running their marketing agency. If you’re interested in learning more about the Modern Millionaires program, you can visit their official website here. However, be sure to read through all of the reviews before making a decision.
In today’s world, many people are looking for ways to earn extra income. This could be because they’re tired of their current job or because it simply doesn’t pay enough. Whatever the reason, there are a few different ways to make money from home. One option is to run a digital advertising agency. This is a great way to get in front of potential customers and generate leads. However, there are a few things you should know before getting started.
First, you should know that the program is not a scam. The founders, Abdul and Chance, are actually successful entrepreneurs who have built several online businesses. In fact, they’ve been featured on Forbes, which is a pretty big deal for anyone in the digital marketing space!
The course teaches you how to create and manage your own digital advertising agency. It also covers the essentials of running ads on Facebook, Google, and other platforms. Additionally, it teaches you how to convert leads into clients and generate sales. In addition, the course includes a comprehensive training section on cold emailing and how to prospect on LinkedIn.
There are three different course packages available, and each is designed to meet the needs of different business models. The DIY package provides training and coaching to help you build your own agency, while the DFY package includes additional mentoring and accountability. The highest-priced option provides a full-service solution to help you start your agency quickly and grow it over time.
Overall, the Modern Millionaires program is a good investment if you’re interested in starting a digital advertising agency. However, be aware that it will take a lot of work to succeed. If you’re not willing to put in the effort, you’re better off finding a different business model. For example, dropshipping is a much more profitable and easier way to make money from home. However, it’s important to choose a business that fits your personality and lifestyle. Otherwise, you’ll be miserable and will probably give up before you see any results. This is why it’s so important to research and find a business that you’ll enjoy!
Many people are calling Modern Millionaires a scam, but it really depends on your perspective. While their business model is legitimate and can help you quit your job, they also paint a much rosier picture of their success rate than is realistic. In addition, their program is expensive, and they don’t offer refunds. So, if you’re looking to make some money online, you might want to look for another program that better fits your goals.
The first thing to notice about Modern Millionaires is that it doesn’t actually teach you how to create a marketing agency. Instead, it focuses on creating lead-generation campaigns for local businesses. The idea is that you can then take this lead information and turn it into paying clients for your marketing agency.
This is a great concept, but it’s not the only way to generate leads for your marketing agency. There are a number of different ways to do this, including social media marketing and search engine optimization (SEO). The problem is that these methods can be time-consuming and difficult to learn, and they don’t always work.
In addition to teaching you how to generate leads, Modern Millionaires also provides you with a number of other tools and resources that can help you build your agency. For example, they provide you with templates that you can use to get started quickly and a private Facebook community that you can join for support. They also provide you with a CRM (customer relationship management) system that will allow you to manage all of your leads and clients in one place.
The course also includes a number of videos and audio recordings that explain how to set up and run your own advertising campaign. It also covers topics such as how to find client prospects, the best way to contact them, and how to create and manage an advertising budget. The course is not perfect, but it is a good resource for anyone who wants to start a marketing agency.
Despite the fact that modern millionaires has some negative reviews and complaints on Trustpilot, it’s still worth considering if you’re interested in starting a marketing agency. While the course is expensive, it’s definitely worth the investment if you’re serious about building a successful business.
Modern Millionaires is a course that teaches students how to make money online by running ads and generating sales. The program is also known as the Officeless Agency and focuses on PPC (paid-per-click) campaigns. The program is developed by Chance and Abdul, who have both achieved a significant amount of success in their own businesses.
The course teaches students how to build their own online marketing agency from scratch. It includes a step-by-step guide to creating a website and setting up SEO (search engine optimization) and social media profiles. It also covers how to create and manage Google Ads campaigns. In addition, the course teaches students how to generate leads and convert them into paying customers.
While the course is worth trying out, it is important to remember that it will take a lot of work and time before you can see any real results. Additionally, the cost of the course is quite high, which may make it unaffordable for many people. If you are looking for a way to make money online, there are many other options available that can be much more affordable.
However, despite the high price tag, Modern Millionaires is still a good option for those who are interested in starting their own online business. The course provides comprehensive training on how to set up and run a successful Google Ads campaign, and it includes live webinars with Chance and Abdul. In addition, the course also includes a private Facebook group and weekly coaching calls.
Why Hire a Chimney Cleaner?
When hiring a chimney cleaner, you should choose one with years of experience. Knowing your home is safe and clean will give you peace of mind. Obtain a chimney brush and enough rods to run the flue’s entire length. Begin at the top of the chimney and, threading on a rod when necessary, scrub downwards.

Clean Chimney Sweep Charleston is essential for safe wood-burning fireplaces and wood stoves. The chimney channels combustion byproducts out of your home, but over time, these toxins accumulate inside creosote, a hard, black substance that can fuel a dangerous chimney fire. Regular chimney cleaning prevents this buildup and frees your home from smoke and soot.
When to clean your chimney depends on how often you burn fires and the type of wood you use, but it should be cleaned at least once a year. Chimney fires caused by creosote are much more serious than chimney fires caused by soot, which makes it especially important to follow a regular cleaning schedule.
There are several ways to clean your chimney, but the most effective is hiring a professional sweep for a thorough cleaning. Professionals will use tools and equipment that prevent dangerous and costly mistakes, such as a specialized video camera to inspect your flue for blockages or other structural problems. They also have the expertise to safely use power tools and climb ladders without damaging your roof or causing a collapsed chimney.
If you prefer to do it yourself, prepare the area by covering the floor and furniture with drop cloths or plastic tarps. Put on a dust mask, safety goggles, and sturdy ladders. Before starting, remove the chimney cap and close the fireplace doors. Next, purchase a chimney brush sized and shaped to fit your flue and enough extension rods to run the flue’s length (rods come in 4-, 5- and 6-foot lengths).
Work from above; start by threading the first rod onto the chimney brush and inserting it into it. Scrub the chimney by letting the meeting slowly descend and adding additional rods when necessary. Continue scrubbing until the brush reaches a stopping point, usually the smoke shelf (a turn in the chimney above the fireplace).
After removing the chimney brush, screw the next rod to the chimney brush and repeat the process. Eventually, you’ll reach the bottom of the flue, where you’ll need to switch to a smaller meeting and begin scrubbing at the firebox opening. Once the chimney is clean, vacuum up any loose creosote and soot using a shop vacuum.
Before a chimney sweep arrives, clear the area around your fireplace and mantel of any furniture or items. Place a cloth or plastic over anything you don’t want soot to fall on. If you’re concerned about flammable objects, such as rugs, cover them in old blankets. Also, be sure to clear a minimum of 3 feet between the fireplace and any combustible materials.
During the cleaning process, your chimney sweep will use brushes and scrapers to remove soot, creosote, animal nests, and other debris from the inside of your chimney. The sweeper will also clean the smoke chamber damper, firebox, lining, and flue pipe. After they are finished, the chimney sweep will vacuum the mess and brush away any remaining creosote before leaving your home.
Dirty chimneys are the cause of many house fires each year. These fires are usually caused by a flammable creosote buildup, the residue from burning wood and other combustibles. A chimney that is not cleaned regularly may contain a dangerous layer of this thick, black material that can catch fire and ignite nearby wood framing and combustible insulation. A chimney fire can spread quickly and destroy your entire home.
In addition to preventing chimney fires, maintaining your chimney will help reduce energy costs. According to the National Fire Protection Association, a dirty chimney can reduce heat transfer efficiency by up to 50 percent. Having your chimney regularly inspected and cleaned by a certified chimney sweep will improve your chimney’s performance and reduce heating bills.
The lingering odors in your home could indicate a problem with the chimney, such as an animal nest or creosote blockage. These problems should be addressed as soon as possible to avoid expensive chimney repairs or damage to your home.
Chimney sweeps use a variety of tools to help them perform their job. These include brushes to scrub away soot and creosote, power vacuums to remove debris, and specialized equipment for analyzing the interior of chimneys. A chimney sweep can also install a chimney cap and spark arrestor to prevent fires in the fireplace and protect the home. Additionally, they may need to install a chimney liner, which keeps moisture and other contaminants from damaging the inside of the chimney.
The most basic tool a chimney sweep uses is the chimney brush. It looks like a large bottle brush with metal bristles around the top. Chimney sweeps attach these to extension rods that are sized and shaped to fit the flue and are then used to clean the chimney. They also use a hose with a filtered vacuum system to keep the air in the client’s house clean during the process.
In addition to the hose and a rotary chimney sweep, some professionals will also bring in a sifter or scraper. These are used to remove tar-like creosote that has hardened into the dangerous stages of creosote glaze.
These are more difficult to remove than the normal stages of creosote, which are easily brushed away. A sifter or scraper helps break up these creosote deposits and makes them easier to remove with the brush. Chimney sweeps also need equipment such as a ladder and an extension ladder for working high in the air. They will also need a safety harness and a pair of work gloves to protect their hands from falling creosote pieces.
Before chimney sweeps arrive home, they should prepare the area by moving furniture away from the fireplace and covering it with plastic or a drop cloth. They should also place a tarp over the roof to protect it from debris and moisture. They should also put down a protective mask to protect themselves from sand, dust, and other chemicals that might be present in the creosote.
A rotary chimney sweep tool is an alternative to a ladder or climbing on the home’s roof. It moves the chimney cleaner in a circular motion, which is more efficient than sweeping by hand. The rotary chimney sweep can remove more creosote quickly and is safer for the technician.
A fireplace produces a lot of smoke and fumes as it burns. As these materials rise through the chimney, they condense on the inside walls and become creosote. It is a dangerous, dark, tar-like byproduct of wood burning that won’t go away. It accumulates rapidly, and large creosote deposits can cause serious problems in your flue and chimney. These buildups prevent toxic gases, including carbon monoxide, from escaping your home. They can also cause chimney fires that could damage the chimney, fireplace, and mantle.
Having your chimney and flue cleaned regularly is important, preferably before each wood-burning season begins. It helps to minimize creosote buildup, which can be dangerous for your family’s health and the structure of your chimney. Creosote can appear in various forms, including a cloud of black powdery dust or flakes, crusty and flaky, drippy and sticky like tar, or shiny and hardened to the surface. Creosote can clog your flue, so combustion gases will not be released from your fireplace or wood stove. These gases can include carbon monoxide, a colorless, odorless, tasteless, and deadly poisonous gas.
In addition to blocking your chimney, a creosote deposit can block the opening of your flue, which prevents wood ash and other debris from falling back into your firebox or onto the floor. If you notice a creosote buildup, have your chimney inspected by a professional as soon as possible.
Chimney sweeps are familiar with the different stages of creosote buildup and can help you prevent it from getting out of hand. Stage 1 or first-degree creosote buildup looks like soot and can be removed easily with a chimney brush during regular cleanings. Stage 2 or second-degree creosote buildup is more difficult to remove and appears like black tar-like flakes. It is a much more serious condition that requires more specialized tools.
If you don’t have your chimney swept regularly, it can progress to the third and most serious stage of creosote accumulation. It is a thick, dark, and tar-like substance that simple brushing can’t remove. It is a very dangerous condition that causes chimney fires, which can destroy the entire structure of your fireplace and chimney. If you suspect a thick, hazardous creosote deposit in your chimney, contact a chimney sweep immediately for an inspection and sweeping.
The Importance of Proper Dock Reconstruction
Docks are exposed to water, sun, wind, and changing temperatures and can deteriorate over time. If you notice excessive rot or rust, it’s important to make repairs right away. Visit https://dockbuildingcharleston.com/ for professional help.

Residential dock reconstruction may require a general permit or COP depending on the construction project and its impact on coastal resources.
Wood that constantly comes in contact with water will eventually deteriorate, and docks are no exception. If not addressed quickly, the problem can result in serious structural issues. This is why regular inspections are so important. During these inspections, you should be on the lookout for loose boards or nails, rotting areas, and any cracks or other damage that may need to be repaired.
The most common issue that can arise from this exposure is wood rot, which occurs when fungus grows in the wood and starts to eat away at it. It is not uncommon for this to start at one spot and spread throughout the entire structure.
If caught in time, rot can be relatively easy to repair with new lumber. However, if it is not, it will continue to spread and will eventually compromise the integrity of your entire dock. The best way to prevent this is by using premium kiln-dried wood and keeping it properly sealed.
Another common issue that needs to be addressed is rust. It is possible for the metal fasteners used in your dock to rust from prolonged moisture exposure, and this can also weaken the structure. Fortunately, rust can usually be repaired by simply removing the old rusted nails and replacing them with new ones.
It is also a good idea to clean your dock regularly. This will help to remove any dirt or debris that has built up over time. You can use a stiff-bristled brush or even a pressure washer, though you should always be careful to avoid damaging the surface of your dock. After scrubbing your dock, you should rinse it thoroughly to ensure that all cleaning solution and loosened debris is removed.
Warped Boards
A dock that’s exposed to the elements 24/7 is bound to age and degrade. Depending on the material and location, a dock can develop various problems such as warping, rusting, or discoloration. Whether the problem is small or widespread, it’s important to identify and address dock issues quickly to prevent further damage and potential safety hazards.
For example, one or two deck boards that have become warped can be easily fixed by a bar clamp and some wood filler, but if the entire dock has a warped surface, it may be time to replace it. This could also mean replacing the entire foundation, a costly repair that can be avoided by addressing the issue promptly.
While a dock’s skeleton is generally sturdy, a damaged frame can lead to structural instability, which poses a serious safety risk. Homeowners typically pay $150 to $500 to fix dock frames, which can include welding or patching damaged sections.
It’s also common for a dock to experience issues with its decking. Wooden decks made from cedar or redwood are susceptible to mildew, rot, and water damage. While a regular cleaning can help keep these issues at bay, these materials do require periodic care and maintenance to last as long as possible.
Composite and other synthetic decking is an excellent choice for a dock because it’s moisture-resistant and easy to clean. These materials also don’t need the frequent staining that many wooden decks do.
Roll-in or lift-up docks, which are usually made from aluminum, are great options for people with limited storage space or who want to be able to roll their boat in and out of the water for winter protection. However, these kinds of docks are more likely to be damaged by rust and general wear and tear than larger, permanent docks.
Rotten Wood
Wooden docks are constantly exposed to the elements. It’s inevitable that the wood will eventually rot, even with proper maintenance. A little rot isn’t always a problem, but if it affects a large area of your dock it can be dangerous and should be repaired immediately.
You can typically spot rotten wood by its dark coloring. It will also be soft and crumbly. In some cases, you may see fungal growth around the rotted areas.
It is possible to treat rotted wood by using a wooden hardener, but it’s often more cost-effective and safer to simply replace the entire board. Once the rotted portion is removed, you can install a new plank that’s resistant to fungus.
While a lot of the material used in docks is pre-treated, you should still regularly inspect your dock for rot and rust. It’s important to remember that if the rot or rust is on a load-bearing support, your dock may need to be replaced.
A good way to prevent rot is to use a wood hardener that’s designed to withstand wet conditions. It’s best to apply the hardener using a brush, so you can get into the crevices and pores of the wood. The hardener should soak into the rotting wood, and once it’s dry, you should be able to scrub away any excess with a stiff brush. A good hose sprayer can be used to rinse off the wood after application, removing any cleaning solution and loosened dirt. This is an important step in dock reconstruction as it ensures that your dock will be protected from moisture and fungus. It can take a while for the wood to completely cure, however.
Metal Fastenings
When it comes to constructing and repairing docks, marine fasteners are an essential part of the process. The corrosive nature of the environment in which a dock is constructed and maintained often demands use of specialized fasteners that can withstand the harsh elements. Stainless steel marine fasteners are often used due to their corrosion resistance and strength.
However, when using stainless steel screws in dock construction it is important that contractors follow the best practices for working with them. The most important practice involves the pairing of stainless screws with other metals that are also made from a non-corrosive metal. This helps to prevent galvanic corrosion which can occur when dissimilar metals make contact with each other.
Stainless steel screws are ideal for dock construction due to their ability to resist corrosion in any type of environment. They are also a great choice for the dock pilings of many types of docks, as they provide an excellent connection between the concrete and the wood. However, constructing dock pilings from steel is challenging because of the difficulty in getting access to the actual connections that are needed for structural safety and integrity. Blind bolts, which offer one-sided installation into the steel that is being used, can provide a solution for this issue by making it possible to construct strong and secure docks.
Another common marine fastener that is used for dock construction is what is called a carriage bolt. These fasteners have a shallow dome-shaped head with a square neck directly underneath. They can be inserted into a round hole in metal or into the square head of most wood fasteners to make them self-locking. They are a great choice for applications involving metal to wood construction and can be used with a flat washer and hex nut (sold separately). Portland Bolt manufactures both stainless steel and galvanized carriage bolts in Grade 2 steel hot-dipped in zinc and are the least expensive metal fasteners suitable for the corrosive environment in which most marinas and other docks are located.
Foundation Deterioration
The most crucial aspect of any dock is the foundation that it sits on. Damage to this is a sure sign that total dock replacement will be necessary, as it is what holds the whole structure up. Any cracking or bending in the foundation is dangerous and needs to be addressed immediately. If the foundation is compromised, the entire dock structure can come tumbling down at the slightest touch of water.
Foundations are essential in any marine project, and docks are no different. The pilings that support the dock must be inspected often to make sure they are still intact. If the pilings are unprotected, they can be a breeding ground for wood boring worms that can destroy them in an instant. This is why it’s important to choose a company that offers piling protection as part of their dock construction services.
If the pilings are protected with piling caps, then they can withstand even the harshest weather conditions. This is one of the best ways to keep your dock from becoming a safety hazard for family and friends.
Once the safety hazards are taken care of, the rebuilding process can begin. Getting the job done right requires careful planning and attention to detail. A quality contractor will also have a staff that is dedicated to the project, highly skilled labor whose pay is commiserate with their experience, manpower to conduct supervision and inspections, and a team of professionals who know what they’re doing when it comes to marine projects. This is why it’s so important to take the time to meet with a contractor and find out more about what they have to offer before choosing them for your next dock project.
Siding Repair – Why It’s Important to Have Your Siding Repaired
Siding is a crucial part of your home, protecting it from the elements. It also adds to your home’s curb appeal and design.
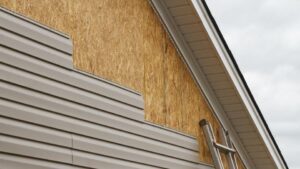
Keeping your siding in good repair is essential to your home’s longevity. Small cosmetic repairs are relatively easy to do yourself and can save you money. However, if you need some help from professionals, contact Charleston Advanced Siding Repair now!
Cracks in siding are not only unsightly, they can also allow moisture to seep into the home and cause serious damage. If the cracks are large enough, water can cause wood to expand and contract, eventually causing rot. Smaller cracks can be repaired using a waterproof caulk or wood filler, which should be colored to match the surrounding vinyl.
If the cracks are too large to repair with caulk, it’s best to replace the section of vinyl that contains them. This is a more time-consuming, but permanent, repair than simply filling the hole with caulk. To remove the vinyl, start by carefully removing any nails or screws that secure it to the house.
Next, remove the old vinyl with a utility knife or tin snips. Be sure to wear a pair of work gloves and safety glasses as working with these types of tools can be hazardous if the proper precautions are not taken.
After removing the damaged vinyl, clean the area with soap and water to ensure that it is free of dirt and debris that may interfere with the adhesion of the caulk. Next, cut a piece of scrap vinyl that is slightly larger than the hole or cracked section. If possible, cut the edge of the scrap to match the curved edges of the broken vinyl.
If you are using a colored caulk to repair the cracks, apply it first over a bead of white caulk that has been applied to the back of the patch. This will help the color to blend in more smoothly. Once the patch has been pressed into place, use a caulk smoother to create a nice and even finish.
Once the caulk has had a chance to cure, you can paint it to match the surrounding vinyl. Be sure to use an alkyd oil-based primer, which will protect the new caulk from UV rays that can cause it to yellow over time. Then, apply a couple coats of your chosen paint and allow it to dry completely before reinstalling the siding panel that was removed.
Holes
Holes in your home’s siding are a serious problem that shouldn’t be ignored. Even the smallest holes in your siding allow for insects and moisture to get underneath. This can cause wood rot and other problems with the framing of your home. In some cases, the rotting can even make it into your walls and ceiling. If this happens, it’s important to call a professional and have the area repaired as soon as possible.
Often, small holes in your siding are caused by pests chewing away at the surface. Regardless of the cause, holes are a sign that you need to have your siding replaced. If they aren’t fixed right away, the damage can spread quickly and lead to more expensive repair costs down the line.
The easiest way to repair a hole in your vinyl siding is to apply some color-matched caulk. However, this can be difficult if your siding is an uncommon color. If you choose to use caulk, it is a good idea to clean the surrounding area before applying it. After the caulk dries, it is a good idea to wipe off any excess and then touch up the spot with matching paint.
Another easy way to repair a small hole in your vinyl siding is to use a fiberglass patch kit. These kits can be purchased at any home improvement store and usually come with instructions that should be followed closely. If you decide to use a fiberglass kit, it is recommended that you have some foil tape handy as well. This will help you ensure that the seams are completely watertight.
If the hole or crack in your vinyl siding is too big for caulking or using a patch kit, it may be necessary to replace the entire section of your siding. Having a professional inspect the situation and provide recommendations will be helpful. Getting the repairs made as soon as possible will help to protect your home’s value, curb appeal, and overall health. In the end, it will also help to save you money. When you do choose to hire a professional, make sure that they have experience and are certified by a reputable organization like the Better Business Bureau.
Warping
Siding that buckles or droops can cause moisture and structural damage to your home. This is especially true for vinyl siding, which can melt and warp from the heat of the sun. If left unattended, this problem can lead to rot and other serious issues that threaten your family’s safety and the integrity of your home. If you notice any signs of warping, it’s important to call a reputable siding contractor.
There are many reasons why siding becomes warped, but one of the most common is that it was nailed too tightly when it was installed. Because vinyl expands and contracts with the temperature, it needs room to move. If it is nailed too tightly, it will begin to warp and bulge. Another reason why siding becomes warped is that the weather causes it to change shape. It is best to keep a close eye on your siding, especially after severe storms and summer heat.
Even if your siding isn’t buckling, it should be inspected for cracks, holes, and general wear and tear. Leaving damaged areas untreated will allow insects to invade your home, and could also lead to wood rot. Additionally, loose or warped siding may blow off during a storm, posing a risk to your family’s safety.
The good news is that if you catch the issue early, you can avoid costly repairs later on. The first step is to find out what caused the warping. If the problem occurred when your home was being built, talk to the installer to see what can be done. It’s also a good idea to regularly inspect your home for damage, twice a year or after severe storms.
Rot
Wood rot is a big issue that can lead to structural damage and soggy insulation. This type of rot is typically caused by an aggressive fungus that feeds on the moisture within wood. It’s usually found in lumber that has been cured and dried for use as siding, although rot can occur with other types of materials used for home siding such as masonite and oriented strand board.
Rot is not something that is easy to repair. A lot of work is involved, and it may be necessary to remove the entire section of rotted siding and replace it with new material. This is a project that requires the assistance of a professional contractor. During the removal process, bracing may need to be installed to make sure that the wall remains secure. The contractor will also remove any siding or other materials that are damaged by the rot, and treat the area with a fungicide to protect the new wood that will be installed.
It’s important to stay up to date with routine home maintenance in order to avoid rot problems. It’s recommended that homeowners perform an inspection of the exterior of their homes twice a year and after severe storms. This will allow them to catch any potential issues before they become a serious problem. It’s also helpful to keep gutters in good condition, as leaking gutters will leak water directly onto the walls of the house.
If the rot is caught quickly, there are products available that can be used to help restore it. In some cases, the rotting will be confined to one or two sections of the siding. In these cases, the professional will likely replace just those areas of rotted siding and not the whole piece of wood that is affected.
If the rot is more widespread, the siding will likely need to be replaced completely. Replacing a whole section of siding can be expensive, so it’s important to evaluate the damage carefully and decide on the best course of action. It is generally a good idea to hire a professional contractor to ensure that the job is done correctly and in compliance with all local building codes.
Benefits of Hiring Vinyl Flooring Installers
Vinyl flooring is an affordable and practical option for homeowners looking to update their floors. Whether you want to install vinyl planks, hiring professionals is the best way to get the job done right.
When choosing a contractor to install your new vinyl floors, it’s important to find one that’s licensed and insured. Additionally, ask about any warranties they offer to cover their work.
Vinyl flooring installers use a variety of methods to install the vinyl floors they sell. Each method has its advantages and disadvantages, so it’s important to choose the one that’s best for your project.
Glue-down is the most common installation method for luxury vinyl flooring (LVT). This method uses adhesive to bond LVT to the subfloor, making it a great option for high-traffic areas. It also allows for more permanent installations and is easier to replace individual planks if they’re damaged.
Direct glue installation is another popular option, and it’s usually the preferred choice for commercial spaces. It involves a special adhesive that bonds LVT to an approved substrate. This installation method is usually more time-consuming, but it can save you money in the long run if you need to redo your floors on a regular basis.
For glue-down, be sure to follow the manufacturer’s instructions carefully and use a clean, dry surface to apply the adhesive. The adhesive should be cured before you move any furniture back to the new floor.
Once the adhesive is dry, it’s time to place your planks or tiles on the underlayment. This step is important to ensure that the planks are securely locked in place. Using a roller to roll over the underlayer and the planks is a good way to ensure that they’re secure.
Next, you’ll want to prepare the space for your new vinyl flooring. You need to remove any existing trim or molding in the area and trim the door jamb so your planks will fit seamlessly. You’ll also need to make sure the subfloor is properly prepared for your new vinyl flooring.
When you’re ready to start laying your new vinyl, get out a notched trowel and some vinyl flooring adhesive. Spread some of the adhesives across the underlayer in a section of the room, then work your way to the other side. You’ll need to leave some time for the adhesive to set, so don’t rush the process and work in sections.
Before starting to lay the vinyl, it’s important to figure out which direction the planks should run. This can depend on the size and shape of the room, as well as any natural or electrical light sources. You can also consider your personal preferences, such as whether you want to run your vinyl planks along a wall or in the same direction as a window.
It’s also important to take into account any other special features in the room, such as a fireplace or a TV. Putting your vinyl flooring in the direction that’s most likely to receive natural or electrical light can help the room feel larger and more open.
Once you’ve finished installing your new vinyl, you can expect it to take about 72 hours for it to acclimate to your home’s temperature. This is important because it helps prevent your new vinyl from buckling and warping. During this time, avoid any heavy traffic, and clean the area according to your manufacturer’s instructions.
Underlayment is a key piece of any vinyl flooring installation. It is used to ensure that your new flooring remains flat and level, as well as to protect your floor against moisture, heat, and noise. It can be purchased in rolls or sheet form and is usually available in a variety of thicknesses.
It’s a good idea to shop around for the best underlayment to match your flooring type. Many different types of underlayments are available, and they differ in R-value, acoustic performance, and thermal insulation.
Generally, it’s recommended to choose an underlayment with a higher R-value than the flooring you plan to install. Underlayments with higher R-values can help keep your floors warmer during the winter and cooler during the summer.
A common type of underlayment is plywood. Plywood is made from wood and can be used with a number of different types of subfloors. It is especially recommended for laminate flooring, as it can fill minor voids in the floor’s subfloor and help your flooring float on top of the subfloor.
Another commonly used type of underlayment is foam. It can be a good choice for hardwood floors and engineered wood, as it can provide excellent noise reduction. It is also ideal for tile and carpet floors, as it can prevent cracks in the tiles caused by house settling or natural movement.
Foam underlayments can also be useful for insulating your floor from heat or cold, depending on the climate of your home. A high-R-value underlayment is typically preferred for those with underfloor heating systems, as it can provide additional insulation.
The underlayment is often placed on the top of the underlying subfloor before installing the floor covering. This allows it to fill a small gap between the underlying subfloor and the flooring material, smoothing out imperfections such as barely protruding screw heads or small knot holes.
A self-leveling underlayment is also a good option for those installing laminate and vinyl flooring over concrete subfloors. It can be poured over low spots that are deeper than 1” and provides a solid surface for the flooring to rest on. It is also a good way to protect your flooring from damage caused by water.
Lastly, rubber underlayments can be an excellent choice for laminate flooring as they offer outstanding sound-absorbing and thermal insulation properties. They’re also eco-friendly and easy to install.
When choosing an underlayment, make sure it has an R-value of at least 2. A low R-value means less insulation, while a high R-value can be used to help keep hot air out during the summer and warm air in during the winter.
If you’re installing a vinyl floor in a commercial building, underlayment is usually required to meet local acoustic requirements and provide additional acoustic insulation. A high-R-value underlayment can also be used to increase the lifespan of your flooring by reducing the amount of maintenance it needs.
Vinyl floors are an excellent choice for homeowners looking to add value and style to their homes. They are durable, easy to clean, and scuff-resistant. The installation process is also quick and affordable.
When installing a new floor, you need to make sure your subfloor is prepared properly. This includes removing any waxes or sealers and making sure it is smooth.
Preparation is the single most important step in a successful flooring installation. It can take over 70% of an installer’s time, but it will pay off by ensuring the finished product looks great and performs well.
Regardless of the type of vinyl flooring you choose, a proper underlayment will help ensure that your new floor is as durable as possible. Different underlayments are recommended for specific applications, so it’s important to follow the manufacturer’s instructions carefully.
You’ll want to lay down a moisture barrier underlayment to protect your subfloor and make it more comfortable to walk on. This will prevent moisture from seeping through the seams between your vinyl planks, which can lead to permanent damage.
Underlayments are available for a variety of materials, including foam, plywood, cork, felt, and particleboard. It’s best to refer to the manufacturers’ guidelines and use a high-quality underlayment designed specifically for your type of vinyl.
Once the underlayment is installed, it’s time to lay down the vinyl floor itself. You’ll need to cut the sheets to fit around protrusions like door jambs and skirting boards.
To start, remove any trim molding that will be in the way of your flooring, if applicable. This will save you a lot of work and headaches down the road.
Next, you’ll need to mark the floor’s layout. This is usually done with a straight edge and compass. This template will be used to guide the flooring in a consistent way throughout the room.
As you work, don’t forget to cut the edges of your vinyl sheets as needed. This will make them look neater and more uniform.
When you cut the sheets, remember to cut slowly and make small cuts at a time. This will help you avoid taking off too much of the sheet at once, which can be difficult to do when you’re trying to get it into place.
If the floor is slanted, you may need to use a leveling hammer or a tape measure to keep your cuts even. This will ensure that your vinyl flooring is perfectly level and that it will look great when it’s complete.
Roof Repair – Why You Need a Qualified Contractor
Whenever you have to have your roof repaired, you have to be sure to find the best contractor to do the job. You need a company that has been in business for a long time and can guarantee quality work. This is a vital factor in having a roof that can last for years to come.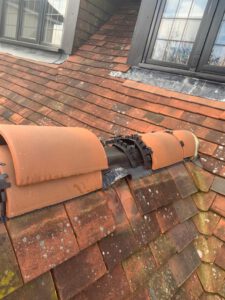
One of the biggest concerns for homeowners during the winter months is detecting and fixing roof water damage. A little leak can quickly become a major problem, leading to expensive repairs. If you suspect a leak in your home, be sure to contact your insurance provider. They will help you file a claim and minimize the damage.
It is important to note that a roof leak may cause not only water damage to the ceiling but to the outside of the home as well. Mold can grow in as little as 48 hours, so you need to act quickly to avoid worsening conditions.
The best way to locate a leak is by using a bright light. You can also use a garden hose to isolate the area.
When you find the source of the leak, be sure to remove the shingles and check the surrounding material. In addition to the obvious roofing materials, you should also check the insulation and other areas of the home that are accessible.
Using a wet-dry vac can also aid in removing water from the roof. This will prevent further rot and mold growth.
Identifying the best and most effective water-removal technique is a key step to repairing any leak. Ideally, you should call a professional contractor to do the job. During the process, you should also document your findings and take pictures.
While most homes have a roof that is easily visible from the ground, some have dramatic slopes that make it nearly impossible to see it from the inside. As a result, you should hire a qualified roofing contractor to assess the storm damage.
Performing the best roof repair for water damage requires the right tools and knowledge. It can also be a dangerous project to attempt on your own. Always wear appropriate protective gear.
Roof leaks can be dangerous and lead to a large amount of damage. They can be difficult to detect, and a few small leaks can cause serious problems over time. The best way to prevent roof leaks is to inspect your home for leaks regularly. You can do this yourself, or you can contact a roofing contractor.
If you have water stains in the attic or a musty smell, you may have a problem. This is a sign that your roof is leaking, and it can lead to rot and mold. Detecting a leak early will help prevent permanent damage to your home.
A common roof leak is caused by a crack in the flashing. It’s also important to look for dents or dings on the gutters and downspouts.
A vapor barrier can be installed between the attic insulation and the drywall to help you detect a leak. You can remove the shingles to see if you can find the leak.
Some signs that you may have a leak include soft spots on the exterior wall of the house, stains on the ceiling, bubbled walls, and water soaking into the wood. These symptoms can be obvious during the repair process, or they can indicate a larger problem.
Water stains on the ceiling can be yellow or brown. When these stains are in large amounts, they can indicate a roof leak. Mold and mildew are common problems that are not immediately noticeable.
If you do notice a leak, it is important to get it fixed. You should call your insurance company to see if you are covered for roof repairs.
In some cases, the damage will be too extensive to be repaired on your own. For example, if you have a vaulted ceiling, access will be difficult.